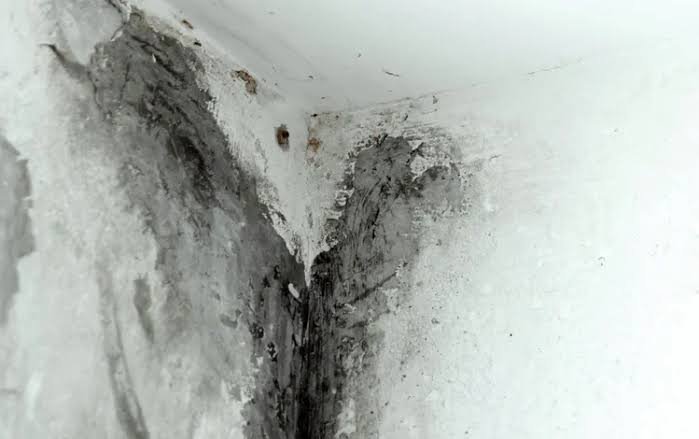
Black mould on silicone sealant is a common problem in bathrooms, kitchens, showers, and around sinks where moisture is regularly present. Those dark marks along bath edges, shower corners, and sink joints can make a clean space look neglected, but the problem is not only cosmetic. Persistent mould growth often indicates excess humidity, trapped moisture, poor ventilation, or ageing silicone that is no longer protecting the surface properly.
Removing black mould from silicone is possible when the growth is only on the surface, but deeply affected sealant may require replacement. Many people spend time repeatedly cleaning mould without solving the real cause, which is why it keeps returning. The most effective approach is to understand why mould develops, use the correct removal method, know when silicone needs replacing, and take steps to prevent future growth.
Why Does Black Mould Grow on Silicone Sealant?
Silicone sealant is commonly used around showers, bathtubs, sinks, and kitchen areas because it creates a waterproof barrier between surfaces. However, waterproof does not mean completely resistant to mould. When water, soap residue, shampoo, oils, and dust remain on the silicone surface, they create an environment where mould spores can grow. Bathrooms are especially vulnerable because warm temperatures and high humidity provide ideal conditions for mould development.
Poor ventilation is one of the biggest reasons black mould appears on silicone. After a hot shower, steam increases moisture levels in the room, and if that humid air cannot escape, water droplets remain on walls, tiles, and sealant. Over time, this repeated moisture exposure encourages mould growth. Old silicone with cracks, gaps, or damaged areas is even more likely to develop problems because water can become trapped underneath the seal.
Another reason mould returns is incomplete cleaning. Removing the visible black marks does not always remove the underlying problem. If moisture continues to collect around the silicone or mould has already entered deeper layers of the sealant, the same dark stains may appear again. Understanding the cause is the first step toward finding a long-lasting solution.
How to Remove Black Mould from Silicone Sealant Step by Step
Before cleaning black mould from silicone, prepare the area properly. Wear gloves, keep the room well ventilated, and avoid disturbing large amounts of mould without protection. Open windows or use an extractor fan to reduce exposure to mould spores. Removing surface mould safely requires patience because rushing the process often leaves stains behind.
Start by applying an appropriate mould-cleaning product directly to the affected silicone. For light mould growth, some household cleaning solutions may help, while heavier staining may require a dedicated mould remover. Allow the product enough time to work instead of immediately wiping it away. Keeping the solution in contact with the silicone gives it a better chance of breaking down mould growth.
After treatment, gently scrub the silicone using a soft brush or an old toothbrush. Avoid aggressive scrubbing tools because damaged silicone can collect more moisture and become harder to maintain. Once the mould has been removed, rinse the area thoroughly and dry the silicone completely. A dry surface is essential because leftover moisture creates the same conditions that allowed mould to grow initially.
Which Cleaning Method Works Best for Black Mould on Silicone?
The best cleaning method depends on how severe the mould problem is. Light surface mould may respond to gentler cleaning approaches, while stubborn black staining usually requires stronger treatments. Choosing the correct method prevents unnecessary damage to the silicone and helps you avoid repeating the same cleaning process without results.
A mould-specific cleaning product is often the most effective option for heavy growth because it is designed to target mould stains. Hydrogen peroxide-based solutions may also help with smaller affected areas. Some homeowners use vinegar for routine cleaning and maintenance because it is a commonly available household option, but it may not be strong enough for mould that has penetrated deeply into silicone.
Bleach-based cleaners are sometimes used for severe mould staining, but they should be handled carefully. Always follow product instructions, ensure proper ventilation, and never mix bleach with other cleaning chemicals. No single cleaner works perfectly for every situation, so the condition of the silicone should determine whether cleaning or replacement is the better choice.
When Should You Replace Silicone Instead of Cleaning It?
One of the most important decisions is knowing whether mouldy silicone can be saved or needs replacement. If the black marks are only on the surface and disappear after treatment, cleaning may be enough. Silicone that remains smooth, flexible, and properly attached to the surface can often continue working after successful mould removal.
However, replacement is usually the better option when mould keeps returning or dark stains remain after repeated cleaning. This often means the mould has affected the inside of the sealant rather than only the outer surface. Cracked silicone, loose edges, peeling sections, or areas where water collects underneath are also signs that the seal may no longer be effective.
Replacing mouldy silicone involves removing the old sealant completely, cleaning away remaining residue, allowing the area to dry fully, and applying new bathroom-grade silicone. Using a mould-resistant sealant can help reduce future problems, but proper installation is equally important. New silicone will not stay mould-free if it is applied over moisture or installed in an area with ongoing ventilation problems.
Why Does Black Mould Keep Coming Back After Cleaning?
Many homeowners experience frustration because they clean black mould from silicone, only to see it return weeks later. This usually happens because the visible mould was treated but the conditions that caused it were not corrected. Moisture is the main factor behind recurring mould, so controlling humidity is just as important as cleaning.
Poor airflow, frequent condensation, and wet surfaces allow mould spores to grow again. A bathroom without proper ventilation may stay damp for hours after use, creating a cycle where silicone never fully dries. Even small amounts of trapped moisture around sealant edges can encourage new growth.
Another common reason is using the wrong cleaning approach. Surface wiping may remove dirt but may not affect deeper mould growth. If the silicone has become permanently stained or damaged, repeated cleaning will only provide temporary improvement. Identifying whether the problem is surface-level or structural helps you choose a solution that lasts.
How to Prevent Black Mould on Silicone in the Future
Preventing black mould is easier than repeatedly removing it. The most effective prevention method is reducing moisture around silicone surfaces. After showers or baths, remove excess water from walls and sealant using a towel or shower squeegee. This simple habit reduces the amount of time silicone remains wet.
Ventilation also plays a major role in mould prevention. Use an extractor fan during and after showers to remove humid air. If possible, allow fresh air into the room by opening windows or doors. Lower humidity levels make it much harder for mould spores to grow and spread.
Regular maintenance can also protect silicone. Clean areas around showers, sinks, and baths regularly to prevent soap residue and dirt buildup. If you notice damaged or ageing silicone, replacing it early can prevent water from becoming trapped behind the seal. Choosing good-quality mould-resistant silicone during installation can also provide better long-term protection.
Common Mistakes When Cleaning Mouldy Silicone
One common mistake is focusing only on the black marks instead of solving the moisture problem. A cleaner may remove the visible stain, but if the bathroom remains damp, mould can quickly return. Successful mould control requires both cleaning and prevention.
Another mistake is using harsh tools that damage the silicone surface. Scraping or aggressive brushing can create small imperfections where moisture collects. Once silicone becomes damaged, keeping it clean becomes much more difficult. Gentle cleaning methods are usually safer and more effective.
People also often continue treating silicone that should be replaced. If mould has deeply affected the sealant, repeated cleaning wastes time and does not provide a permanent solution. Recognising when replacement is necessary can save effort and prevent future water damage.
How to Keep Bathroom Silicone Clean and Mould-Free
Keeping silicone clean requires small but consistent habits. Regularly removing water, cleaning soap residue, and allowing surfaces to dry can make a significant difference. Mould prevention does not require complicated routines; it requires controlling the conditions that allow mould to grow.
When installing new silicone, preparation is extremely important. The old sealant should be removed completely, and the surface should be clean and dry before applying new material. Applying silicone over damp areas can trap moisture and create another mould problem in the future.
A combination of proper installation, regular maintenance, and good ventilation provides the best protection against black mould. Silicone is designed to protect your home from water damage, but it works best when the surrounding environment is kept dry and well maintained.
Frequently Asked Questions
How do you remove black mould from silicone sealant?
Black mould can be removed by applying a suitable mould treatment, allowing it time to work, gently scrubbing the silicone, and drying the area completely. If the mould has penetrated deep into the sealant, replacement may be necessary.
Why does black mould keep returning on bathroom silicone?
Black mould usually returns because of ongoing moisture, poor ventilation, trapped water, soap residue, or damaged silicone. Cleaning alone will not solve the problem if the conditions causing mould growth remain.
Does vinegar remove black mould from silicone?
Vinegar may help with light surface mould and general maintenance, but it may not remove deep mould staining from silicone. Severe cases often require stronger treatment or replacing the affected sealant.
Should I replace silicone if black mould does not disappear?
Yes, replacement is often the best solution when black marks remain after cleaning, mould returns quickly, or the silicone is cracked or damaged. Deep mould inside silicone cannot always be removed effectively.
How can I stop black mould from growing on silicone again?
To prevent mould from returning, keep silicone dry, improve bathroom ventilation, clean soap residue regularly, repair damaged sealant, and use mould-resistant silicone when replacing old seals.
You May Also Read: Lebara vs Voxi